
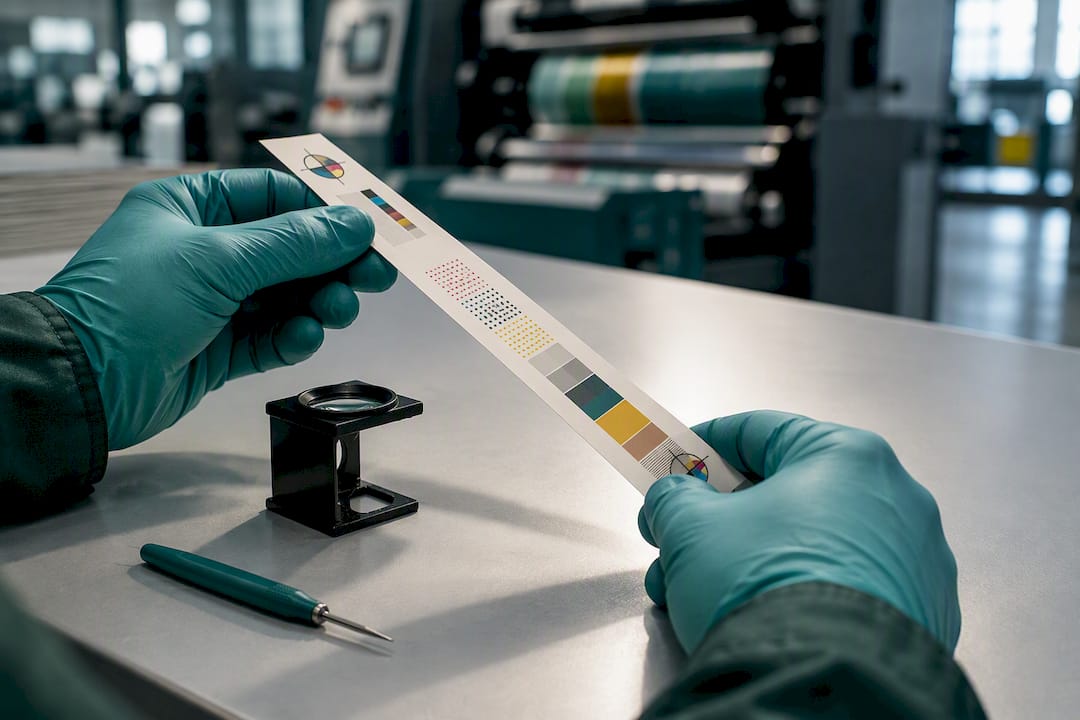
Design for flexo printing assuming a conservative minimum reproducible dot of 3 to 5%, line screens tied to substrate (film runs 120 to 150 LPI, corrugated post-print drops to 65 to 100 LPI), minimum positive type around 5 to 8 point, and trap widths set only after a press fingerprint confirms actual behavior on your specific press, plate, and anilox combination.
TL;DR:
- Minimum dot sizes typically range from 2% to 5% depending on substrate and press conditions, with 3 to 5% being the safer production threshold.
- Line screens vary from 85 LPI for uncoated kraft to 150 LPI for film and coated paper, with actual achievable detail depending on substrate and press setup.
- Proper distortion compensation, screening choice, and dot-gain curves are essential in prepress to prevent printing defects and rely heavily on press-specific calibration.
- Ink coverage limits and trap widths must be tailored to each substrate type and press condition to prevent blocking, registration issues, or loss of detail.
- Press fingerprinting and measurement of dot gain are crucial for verifying limits, especially for fine detail, small type, and barcode legibility, and should be repeated regularly during long runs.
Table of Contents
- What Are the Practical Flexo Printing Limits Designers Face?
- Artwork and Prepress Limits: Distortion, Screening, and Trapping
- Press and Consumables Limits: Anilox, Plate Relief, and Impression Pressure
- Substrate-Specific Limits: Film, Coated Paper, Kraft, and Corrugated
- Color, Ink, and Drying Limits: TAC, White Underbase, and Blocking Risk
- Registration, Repeat Length, and Mechanical Limits
- Barcode and Small Type Legibility Limits
- Quality Control and Press Fingerprinting: The Verification Step That Makes Every Other Limit Real
- What Experience With Retail Bag Printing Actually Teaches Designers
- How Gather Packaging Supports Designers Working Within These Limits
- Sources
- FAQ
What Are the Practical Flexo Printing Limits Designers Face?
Every one of these numbers shifts with substrate, plate hardness, anilox specification, and press condition, which is exactly why the numbers below are starting points, not guarantees. Treat them as the range you design toward before a fingerprint run tells you what your specific press can actually hold.
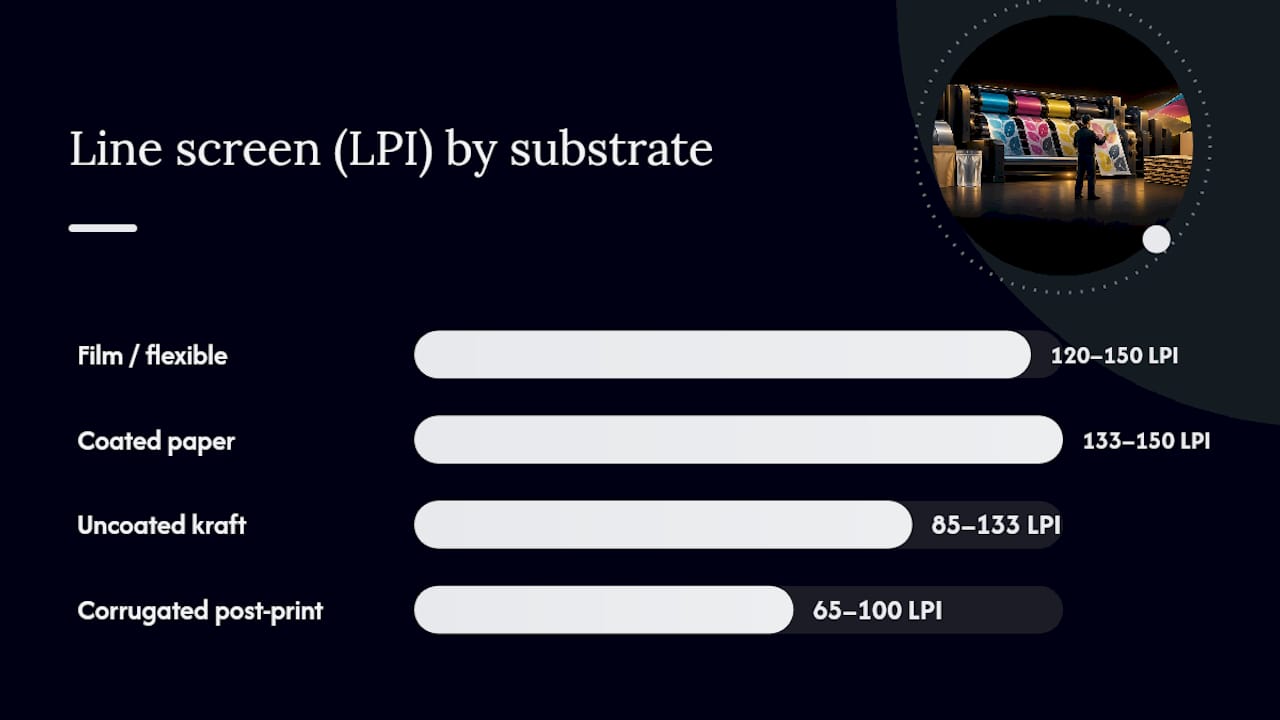
Line screen (LPI) by substrate class:
- Film and flexible packaging: 120 to 150 LPI, with 133 LPI often the practical sweet spot between sharpness and dot-gain control
- Coated paper (retail shopping bags, cartons): 133 to 150 LPI is typical, matching the line screen used in converter spec sheets built for high-fidelity brand printing
- Uncoated kraft paper: 85 to 133 LPI, since the rougher surface limits how fine a dot the substrate can hold
- Corrugated post-print: 65 to 100 LPI, a hard ceiling driven by board surface and documented printing tolerances
Minimum dot and type: A published flexo spec sheet lists a minimum dot of 2% as a working floor, though most prepress teams treat 3 to 5% as the safer production minimum once plate wear and anilox transfer variance are factored in. Minimum positive type generally sits at 5 to 6 point; reverse (knockout) type needs to be larger, typically 7 to 8 point on film and coated paper, and 10 to 14 point on corrugated. Rule and line weights follow the same logic: hairline rules under 0.5 point rarely hold on press.
Trap widths: Trap requirements swing widely by substrate and press. Narrow-web label work can hold traps as tight as 0.005 inch, while corrugated post-print guidelines call for 0.30 to 1.0 millimeter, roughly ten to twenty times wider, to absorb registration drift.
Total ink coverage limits vary by substrate and ink system, but pushing past what the paper or film can absorb in the available dryer length is the most common cause of blocking on rewound rolls.
Artwork and Prepress Limits: Distortion, Screening, and Trapping
Three prepress steps determine whether your artwork survives the trip from file to plate to printed sheet: distortion compensation, screening selection, and trapping. Skip any one of them and the limits above stop being limits and start being defects.
Distortion (shrinkback) compensation comes first because it happens before the image ever gets screened. When a flexible plate wraps around a print cylinder, the outside surface stretches relative to the cylinder’s true circumference, and that stretch shows up as compression in the print direction once the plate goes flat again. A 1.70 mm plate mounted on a 600 mm repeat produces roughly 1.78% distortion in the print direction, meaning circles print as slight ellipses unless the prepress software compensates before imaging. The compensation factor depends on plate thickness, mounting tape thickness, and cylinder circumference, so it has to be recalculated for every press and repeat combination rather than reused from a previous job.
Screening choice comes next. Traditional AM (amplitude-modulated) screening remains the default for most packaging work, but FM (frequency-modulated) and hybrid screening can hold detail in highlights where AM dots would otherwise break down below the minimum reproducible size. The anilox-to-screen ratio matters here: aim for at least four anilox cells transferring ink to every halftone dot, and keep separation screen ruling at or under 25% of the anilox line count. Violate that ratio and dots either starve for ink or flood, and no amount of RIP tweaking fixes it after the fact.
Dot-gain compensation curves are the third piece, and they are press-specific by nature. A curve built on one press, plate stock, and anilox combination will misrepresent tone on a different press, which is why compensation curves get rebuilt whenever any major variable changes.
- Print a calibration strip covering 1% through 99% tonal steps across highlights, midtones, and shadows.
- Measure actual printed dot percentage against the intended file value at each step.
- Build a compensation curve that pulls back the file value wherever measured gain exceeds target.
- Bake that curve into the plate-making workflow so every job on that press condition inherits it automatically.
Trapping rules follow a similar substrate-driven logic. Reverse elements and tight registration areas need wider traps than solid-to-solid abutments, and gradients or vignettes need cutback applied gradually rather than as a single hard step, or the transition band shows as a visible seam.
Pro Tip: Build your distortion compensation and dot-gain curve as two separate steps, never one blended correction. Combining them makes it nearly impossible to diagnose which variable caused a tone shift when the next job runs on a different plate thickness.
Press and Consumables Limits: Anilox, Plate Relief, and Impression Pressure
Anilox specification is the single biggest lever most designers never see, because it lives entirely in the pressroom, yet it decides how many of your fine detail actually survives ink transfer. Fall short of that ratio and small dots either lose definition or disappear entirely, because there simply is not enough ink volume reaching them consistently.
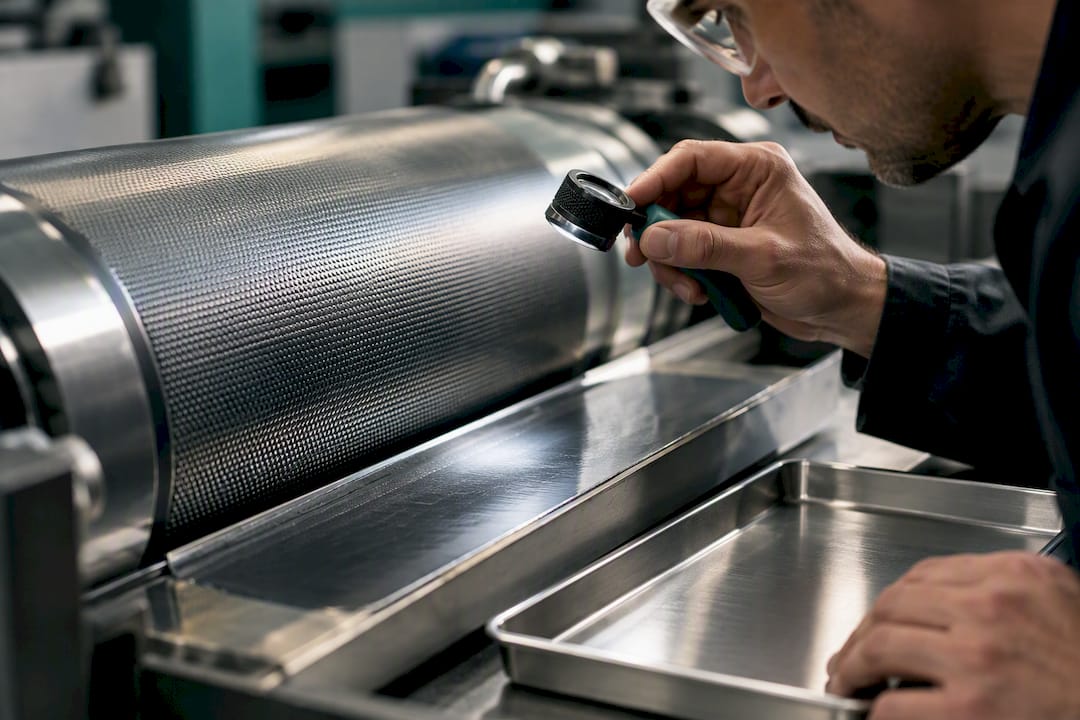
Plate hardness and relief work against each other. Softer plates (measured in Shore A durometer) compress more under impression, which helps hold fine detail but increases dot gain in the midtones. Harder plates resist that compression better: testing on self-adhesive label stock found a 74 HA plate reduced midtone dot gain by roughly 4 to 5 percentage points compared to a 65 HA plate run at the same impression setting. For coated paper shopping bags carrying brand-critical fine text, a modestly harder plate in the 70 to 74 HA range often holds small type and midtone stability better than a softer plate optimized purely for solid coverage.
Impression pressure is the compromise that never fully resolves. Solids want enough pressure to lay down full, even ink coverage; halftones want the minimum pressure that still transfers a clean dot, because excess pressure squashes dots and inflates gain. Mixed artwork containing both solids and fine halftones forces a middle setting that slightly under-serves each. Treating impression as a documented, controlled setting rather than an operator’s feel for the job is what keeps density consistent across a long run.
Operational wear tightens every one of these limits over time:
- Anilox cells plug gradually with dried ink and coating residue, reducing effective volume and starving fine dots first.
- Plates lose relief sharpness after repeated runs, softening edges on small type and fine rules.
- Both effects mean a press fingerprint done on day one of a plate’s life will not hold true after months of production, so periodic reverification matters on long-running programs.
Substrate-Specific Limits: Film, Coated Paper, Kraft, and Corrugated
Substrate choice sets the ceiling on almost everything else in this article. Surface energy and corona treatment level determine whether ink adheres at all before anyone worries about dot fidelity, and each substrate class carries its own realistic LPI, minimum dot, and registration expectations.
- Film: High corona treatment levels support strong ink adhesion and the finest achievable line screens in this list, 120 to 150 LPI, making film the substrate of choice when brand artwork demands the most detail.
- Coated paper: The smooth surface used for premium retail shopping bags holds 133 to 150 LPI reliably and is the substrate where fine type and gradient work read cleanest.
- Kraft paper: The visible fiber texture caps practical line screen around 85 to 133 LPI; pushing finer than that on uncoated kraft usually produces uneven, mottled highlights rather than crisper detail.
- Corrugated: Post-print directly on corrugated board is limited to roughly 65 to 100 LPI, and designs needing tighter graphics or process color fidelity should shift to pre-print on liner board laminated to the corrugated structure afterward.
Caliper and dimensional stability matter as much as surface texture. A caliper shift changes nip geometry, which changes impression and can shift color even when ink formulation stays identical. Best practice calls for a material change notification whenever substrate caliper varies beyond about 3 microns, triggering an impression requalification run before that lot goes into full production. Skipping that step is one of the most common causes of a color complaint that has nothing to do with the ink at all.
Color, Ink, and Drying Limits: TAC, White Underbase, and Blocking Risk
Total ink coverage, or TAC, sets a practical ceiling on how much ink a substrate and dryer combination can handle before the sheet either fails to dry properly or blocks (sticks to itself) once rewound. Coated paper and film generally tolerate higher TAC than uncoated kraft, which absorbs ink more slowly and stays tacky longer through the dryer. Pushing coverage past what the dryer length and substrate can handle at line speed is the single most common cause of set-off and blocking complaints on finished rolls.
- White underbase on kraft, printed-on-color, or metallized substrates needs enough opacity to hold color fidelity for the topcoat inks, and getting that opacity right without over-inking is a balance best confirmed on a proof run rather than assumed from a formulation sheet. Gather Packaging’s guidance on white ink underbase covers mesh selection and flash settings for this exact scenario.
- Water-based inks dry more slowly than solvent or UV systems but avoid the migration concerns that matter for foodservice takeout bags, making the trade-off between speed and safety substrate and application dependent.
- Flash or oven temperature and dwell time need to match ink film thickness; too little heat leaves tack that causes set-off, too much risks scorching lighter substrates.
- Sequencing matters on multi-station presses: printing the white underbase early in the station order and giving it a dedicated flash zone before the color stations reduces the risk of dot-clogging on the finer halftone plates that follow.
Pro Tip: If a job runs both a heavy solid panel and fine reverse type on the same plate cylinder, request a split test run before committing to production. Solids and fine detail often need slightly different impression settings, and finding that out on press day costs far less than finding out after a full print run ships.
Registration, Repeat Length, and Mechanical Limits
Cylinder repeat length and diameter are physical constraints that exist before a single pixel gets designed. Every press has a defined set of repeat lengths its cylinders can produce, and artwork sized outside those repeats either wastes plate real estate or forces an undersized cylinder that limits print quality.
- Confirm the target press’s available cylinder repeats before finalizing bag panel dimensions, since designing to a common repeat avoids custom cylinder costs and inventory sitting unused between runs.
- Budget registration tolerance into trap width rather than treating them as separate specs. Tighter registration tolerances allow narrower traps; looser tolerances on corrugated or long webs demand the wider traps covered earlier.
- Use step-and-repeat layout to fit multiple bag panels or SKUs across the available substrate width, minimizing trim waste on each cylinder revolution.
- Recheck repeat and registration assumptions any time the substrate, caliper, or press changes, since a layout that registers cleanly on one combination may not on another.
Corrugated post-print work generally carries wider registration tolerances than film or coated paper, which is part of why documented technical guidelines push designers toward larger reverse type and wider traps on that substrate rather than trying to force tight-registration graphics onto a process that cannot reliably hold them.
Barcode and Small Type Legibility Limits
Barcodes fail more often from Bar Width Reduction (BWR) mistakes than from any other flexo variable, because dot gain adds width to bars the same way it adds density to halftone dots. BWR compensates for that gain by shrinking bar widths in the file before plate-making, and the correct amount depends on substrate, anilox, and measured dot gain rather than a single universal number, which is exactly why a press fingerprint should inform the BWR value rather than a default template.
- Request the press’s measured dot-gain data before setting BWR, and adjust per substrate class rather than reusing one BWR value across film, kraft, and corrugated jobs.
- Hold minimum positive type at 5 to 6 point and reverse type at 7 to 8 point on film and coated paper; corrugated needs reverse type closer to 10 to 14 point to stay legible after gain and registration drift.
- Verify barcode grade with a scanner before production, not after, using the actual plate and substrate combination the job will run on.
- If a barcode sits over a busy background or on a substrate prone to heavier gain, move it to its own single-color plate or a cleaner section of the layout rather than fighting the gain with compensation alone.
Quality Control and Press Fingerprinting: The Verification Step That Makes Every Other Limit Real
Every number in this article is a guideline until a press fingerprint confirms it on the specific press, plate, anilox, ink, and substrate combination running your job. A proper fingerprint captures actual dot gain, color gamut, and tonal behavior under real production conditions, and that data becomes the foundation for both the ICC color profile and the dot-gain compensation curve used on every subsequent job on that press condition.
- Print a calibration strip carrying tonal steps from 1% through 99%, covering highlights, midtones, and shadows separately.
- Measure each step’s actual printed density and dot percentage against the file’s intended value.
- Build the dot-gain compensation curve from that measured gap, then verify it by reprinting the same strip and confirming the curve holds.
- Generate the ICC profile from the fingerprinted color gamut so downstream proofing matches what the press can actually reproduce.
- Document acceptance tolerances (register, dot gain, density) so future runs on that press condition have a clear pass or fail standard rather than a subjective one.
Gather Packaging runs this kind of fingerprinting discipline as part of its domestic Toronto production, pairing pre-press proofing and prototyping with 8-color flexo capability so designers see how brand-critical art will actually hold before a full production run commits. That combination of prepress and physical prototype review catches distortion, trap, and dot-gain issues while they are still cheap to fix.
Statistic Callout: A single plate hardness change from 65 HA to 74 HA measurably shifted midtone dot gain by 4 to 5 percentage points in documented label testing, which is a large enough swing to move a design from comfortably within spec to visibly muddy in the midtones. That is the kind of variable a fingerprint catches and a guess does not.
What Experience With Retail Bag Printing Actually Teaches Designers
Brand-critical artwork on a retail shopping bag rarely fails because the concept was too ambitious. It fails because nobody tested whether the press, plate, and substrate combination could hold the finest elements of that concept before the full run committed. HD flexo plates or an extra spot-color station earn their cost on jobs where a logo’s fine linework or a gradient background is the entire point of the design, but that decision belongs early, not as a rescue attempt after a proof comes back soft.
Turn-top and serrated-top bag programs carry different risk profiles: turn-top designs often carry more visible face panel space for fine detail, while serrated-top runs tend to prioritize speed and cost over maximum print fidelity. Prototyping early, before locking dielines and colors, catches distortion and trap problems while a design change still costs a revision instead of a reprint. Gather Packaging’s integrated prepress and quality assurance process exists specifically to catch those problems on a proof run rather than a production run, which is where the real cost difference lives.
— Taylor
How Gather Packaging Supports Designers Working Within These Limits
The domestic alternative to overseas converters offers flexo limits solved before a production run, not discovered after one ships. Constraints from anilox selection to trap width to press fingerprinting get checked during prepress and prototyping, so a design gets verified against real press behavior instead of a generic spec sheet.

Our services cover the full path from concept to finished bag: packaging consultation and quotation, die-line preparation, graphic design and layout support, pre-press proofing, and pre-production prototyping, all backed by 8-color flexo capability and in-house quality assurance. Whether you’re specifying a coated paper turn-top bag with brand-critical fine type or a kraft serrated-top bag for high-volume retail distribution, our team can review your files against the substrate and press variables that actually govern printability. Browse our Turn Top, Serrated Top, and Tamper-Resistant Serrated Top bag lines to see current styles and customization options, then reach out to request a preflight review or a physical proof run before your next order goes to plate.
Sources
These sources back the numeric ranges and methodology throughout this article and are worth keeping on hand for detailed spec work:
- Flexo Print Design Engineering: DFM & Tolerances | RIT thesis
- Flexographic Dot Gain Control for Self-Adhesive Labels | Plate Hardness & Compensation Guide
- Prepress / Flexo Postprint Technical Guidelines | STI Group
- Packaging flexographic print specs (Quad Packaging PDF)
FAQ
How large can you print a 300 DPI image before flexo limits break it down?
Image resolution and flexo line screen are separate variables, but file resolution generally supplies enough data for line screens up to 150 LPI without visible pixelation. The real ceiling comes from the press and substrate, not the file resolution: corrugated post-print caps out around 65 to 100 LPI regardless of how high the source image resolution is.
What will not allow you to print fine detail in flexo?
Several factors independently block fine detail: insufficient anilox cell volume under each halftone dot, plate relief too soft to hold small type sharp, missing distortion compensation that stretches artwork in the print direction, and skipping a press fingerprint that would have flagged the minimum dot your specific setup can actually hold. Any one of these can undo careful artwork prep before the job even reaches the press.
What is the minimum dot in flexo printing?
A published flexo spec sheet lists a minimum dot as low as 2%, but most prepress teams treat 3 to 5% as the safer working minimum once plate wear and anilox transfer variance are accounted for. The achievable minimum ultimately depends on plate hardness, anilox specification, and substrate, which is why a press fingerprint should confirm it rather than a general rule.
What is the future of flexographic printing?
Flexo continues to close the quality gap with other print methods through finer anilox engraving, harder and more precise plate materials, and tighter press-level color management including ICC profiling built directly into prepress workflows. For packaging buyers, that trend means substrates like coated paper and film can increasingly support finer line screens and more brand-critical detail without abandoning flexo’s cost and speed advantages for mid-to-high volume runs.
How do trap widths change between substrates?
Trap requirements scale with registration tolerance: narrow-web film work can hold traps as tight as 0.005 inch, while corrugated post-print needs 0.30 to 1.0 millimeter to absorb wider registration drift. Coated paper shopping bags typically fall between those extremes, and the exact trap width should come from the press fingerprint for that specific job rather than a fixed default.
Share:
Stop Reprints and Plate Costs for Paper Bag Printing Plates for Buyers
Canadian Procurement: Require Mill Run Data for Recycled Content Claims